Docker–How to move container from one Windows host to another

In my article on docker container (https://mdaslam.wordpress.com/2017/05/24/windows-server-2016-docker-container-dockerfile/), I described how to create docker container.

Now docker container is created and you want to migrate/copy it from one windows server machine/host to another.

You cannot copy the running container from one host to another, rather you need to follow the following steps –

  1. Commit it
  2. Export the docker image to the local drive using the command – docker save –o <Path of the output file location> <Image ID or Name> Example – docker save –o “d:\temp\images\dotnetsamples” d242f2db7922
  3. It will copy the image on the given location. In the above example, it will be “d:\temp\images”.
  4. Now copy the above newly exported image to the target windows 2016 server.
  5. Once copied there successfully, load it onto that server using the command – docker load –i <Path of the output file location> Example – docker load –i “d:\temp\images\dotnetsamples”
  6. On the successful execution of the above command, image will be restored successfully. To verify it, run the command – docker images and it should display the imported image name in the results.
  7. Finally, Once image is created successfully, we need to create the container. It can be created using the command – docker run -d -p 80:80 [ImageName] ping -t localhost
  8. It will create the container. You can get the list of running containers using the command – docker container ls

               ——-End Of Article—–

Windows Server 2016–Docker Container–dockerfile

Requirement is to configure docker image and run IIS based container to install/configure a website using DockerFile.

Here are the steps that needs to be done to implement the above requirement –

  1. Import microsoft/iis image from the Docker secure registry.
  2. Create the dockerfile to do the below activities –

    a. It installs .net features needed by the application.

    b. It copies application published data to the container.

    c. It creates and configures website with application pool.

    d. It sets .Net trust level.

    Note – Using this dockerfile, we can create container anywhere in any windows server 2016 environment.

    Here is the content of the dockerfile –

    ——————

FROM microsoft/iis  

SHELL ["powershell"]

RUN Install-WindowsFeature NET-Framework-45-ASPNET ; \  

    Install-WindowsFeature Web-Asp-Net45

COPY Web C:\\inetpub\\wwwroot\\Web  

RUN Remove-WebSite -Name 'Default Web Site'  

RUN New-Website -Name 'abc' -Port 80 \  

    -PhysicalPath 'C:\inetpub\wwwroot\Web' -ApplicationPool '.NET v4.5'

EXPOSE 80

RUN & c:\windows\system32\inetsrv\appcmd.exe set config /commit:WEBROOT /section:trust /level:Full


CMD ["ping", "-t", "localhost"]

Copy the above content into the text file and name it like dockerfile without any extension. Important note is that this file should not have any extension. Keep it in the same folder where you have kept the web folder (containing the published code of your site ‘abc’).

        3.  Built the image using the above dockerfile using the command for the location where you have kept the dockerfile – docker build –t [imageName] .

       4. Above command creates the image and you can access the list using the command – docker images

image

      5. Once image is created successfully, we need to create the container. It can be created using the command – docker run -d -p 80:80 [ImageName] ping -t localhost

It will create the container. You can get the list of running containers using the command – docker container ls

image

Complete flow of step 3,4 and 5 is given below –

image

Once all above steps are done successfully, you can browse your web application using any browser.

If you want to look inside the container, you can run the below commands and it will open the command prompt (cmd or PowerShell) inside the container and then you can using different commands to view the files –

1) For DOS command  – docker exec –I [ConatinerID] cmd

image 

2) For PowerShell command – docker exec –I [ContainerID] powershell

image


———-End of Article———

Docker Container–Windows 2016 Server–With SEP (Symantec Endpoint Protection)

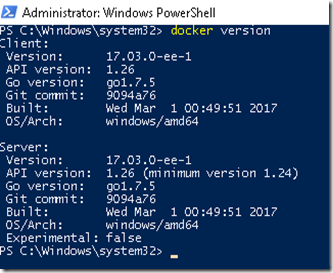
Scenario – You have Windows Server 2016 machine and you have installed and configured Docker. After successful configuration, docker version command can give the information about the installed version.

image

You want to host IIS based website and so you have imported microsoft/iis image from docker secure registry successfully. You now wants to run the container using the command like –

docker run –d –name myFirstIISAap –p 80:80 microsoft/iis

You might get the below error message –

Error response from daemon: container c44wuweuwe323232xxxxx encountered an error during start: failure in a windows system call : This operation returned because the timeout period expired. (0x5b4)

image

Solution –

The following steps were taken:

  1. SEP V14mp1 (14.0.2332.0100) installed with all features – above issue present
  2. Remove SEP completely – no issues. Container created successfully.
  3. Re-install SEP with basic AV features only – no issues. Container created successfully.
  4. Modify SEP installation to include ADC feature – above issue present (at this stage advanced logging was enabled in SEP, error reproduced, and Symantec Diagnostic tool used to compile all logs for support purposes)
  5. Modify SEP installation to remove ADC feature and add IPS (NTP), SONAR (PTP) and Advanced Download Protection features – no issues. Container created successfully.- This could be the recommended solution.

Docker–Windows Server 2016

Requirement is to understand how to deploy IIS based website in the container.

To play around, create a Windows Server 2016 based VM in MS Azure.

Steps to follow –

  1. Configure Docker environment in Windows Server 2016:

            Run the below commands –

      • Install-PackageProvider -Name NuGet -MinimumVersion 2.8.5.201 -Force
      • Install-Module -Name DockerMsftProvider –Force
      • Install-Package -Name docker -ProviderName DockerMsftProvider -Force
      • Restart-Computer –Force


        2.   To verify, it it is installed correctly, Run the command –

              docker version 

            image


        3. Next step is to pull the IIS image from docker secured registry. Run the below command –

            docker pull Microsoft/iis

            This command will take some time to pull and extract the IIS image onto the server. Once completed successfully, run the command “docker images” to list the images pulled from DSR.


         clip_image001


     4. Run the following command to start the container –

         docker run –d –name myFirstIIS –p 80:80 microsoft/iis

     5. Run the following command to list all the running containers –

         docker ps –a

          Or

         docker container ls

     6. Run the following command to open the command prompt inside the container – docker exec –I myFirstIIS cmd

     7. Write index.html in the inetpub of the IIS in the container as –

      echo "Hello World From a Windows Server Container" > C:\inetpub\wwwroot\index.html

        image

     7. Browse the IIS site as shown below –

        clip_image002


All the steps above can be done through DockerFile concept. I will explain it in the next article.


                  ——End of the Article—–